Toolbox UI
Toolbox UI is a built-in web interface that allows users to visually inspect and test out configured resources such as tools and toolsets.
Launching Toolbox UI
To launch Toolbox’s interactive UI, use the --ui flag.
./toolbox --ui
Toolbox UI will be served from the same host and port as the Toolbox Server, with the /ui suffix. Once Toolbox
is launched, the following INFO log with Toolbox UI’s url will be shown:
INFO "Toolbox UI is up and running at: http://localhost:5000/ui"
Navigating the Tools Page
The tools page shows all tools loaded from your configuration file. This corresponds to the default toolset (represented by an empty string). Each tool’s name on this page will exactly match its name in the configuration file.
To view details for a specific tool, click on the tool name. The main content area will be populated with the tool name, description, and available parameters.
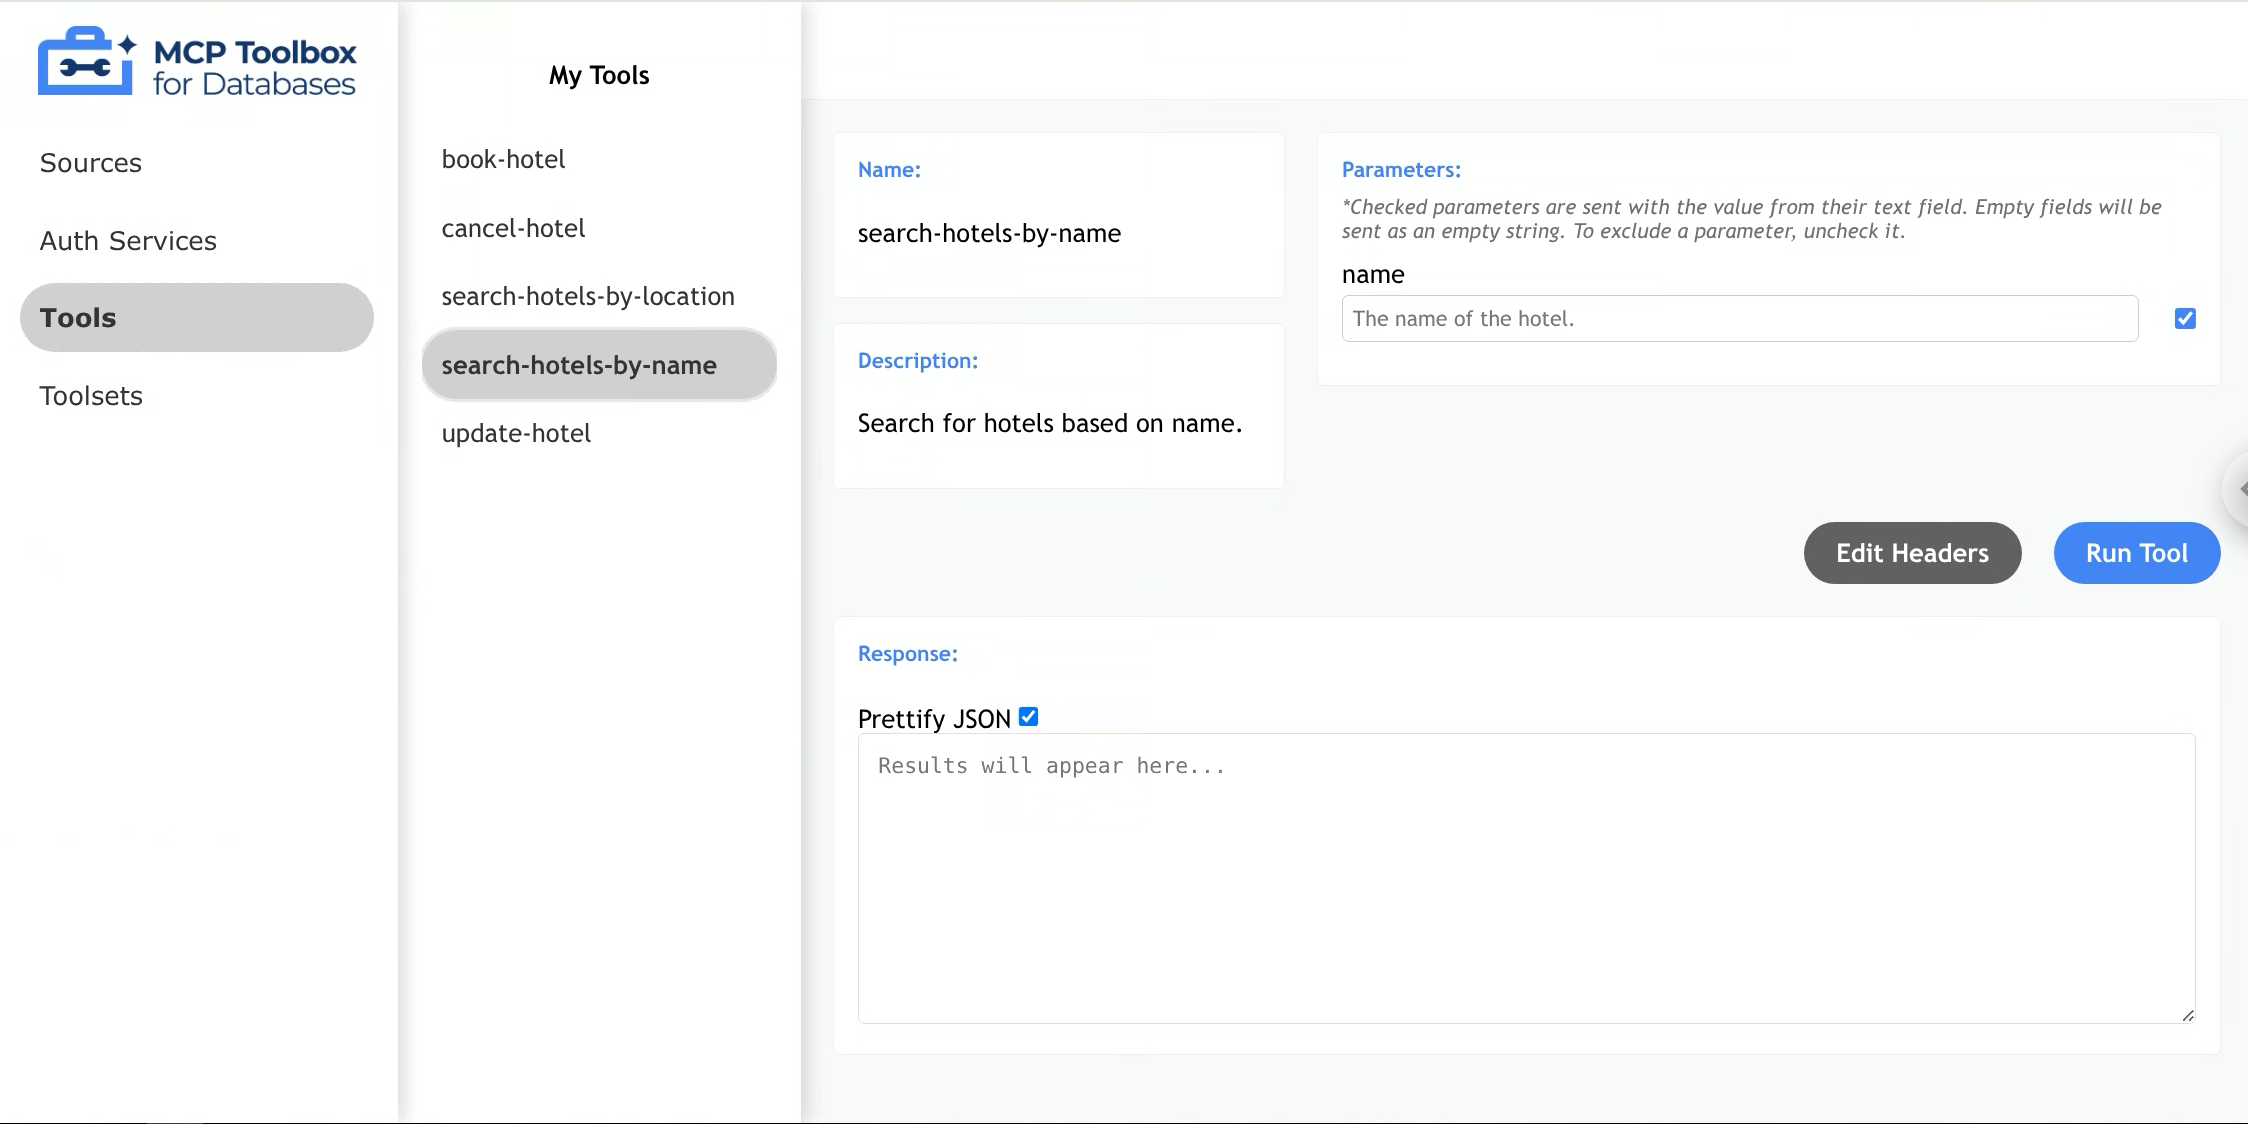
Invoking a Tool
- Click on a Tool
- Enter appropriate parameters in each parameter field
- Click “Run Tool”
- Done! Your results will appear in the response field
- (Optional) Uncheck “Prettify JSON” to format the response as plain text
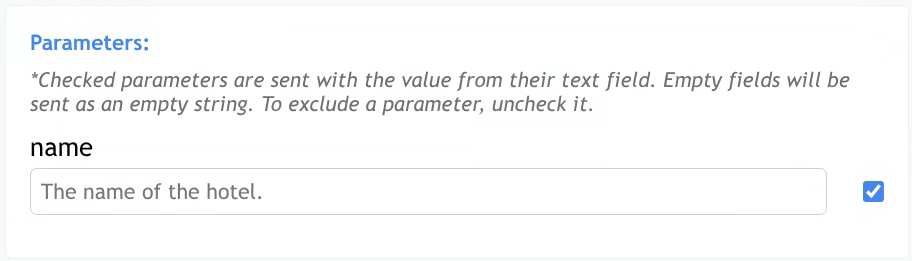
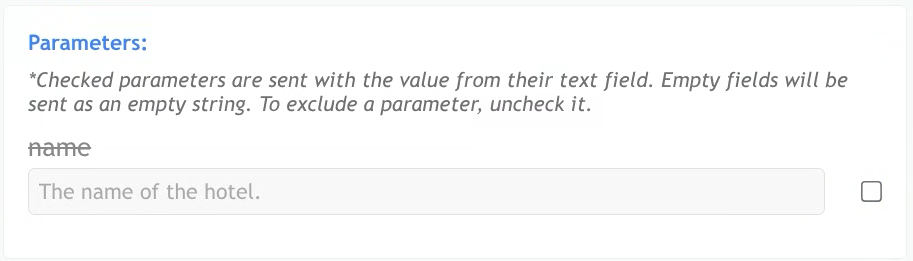
Optional Parameters
Toolbox allows users to add optional parameters with or without a default value.
To exclude a parameter, uncheck the box to the right of an associated parameter, and that parameter will not be
included in the request body. If the parameter is not sent, Toolbox will either use it as nil value or the default value, if configured. If the parameter is required, Toolbox will throw an error.
When the box is checked, parameter will be sent exactly as entered in the response field (e.g. empty string).
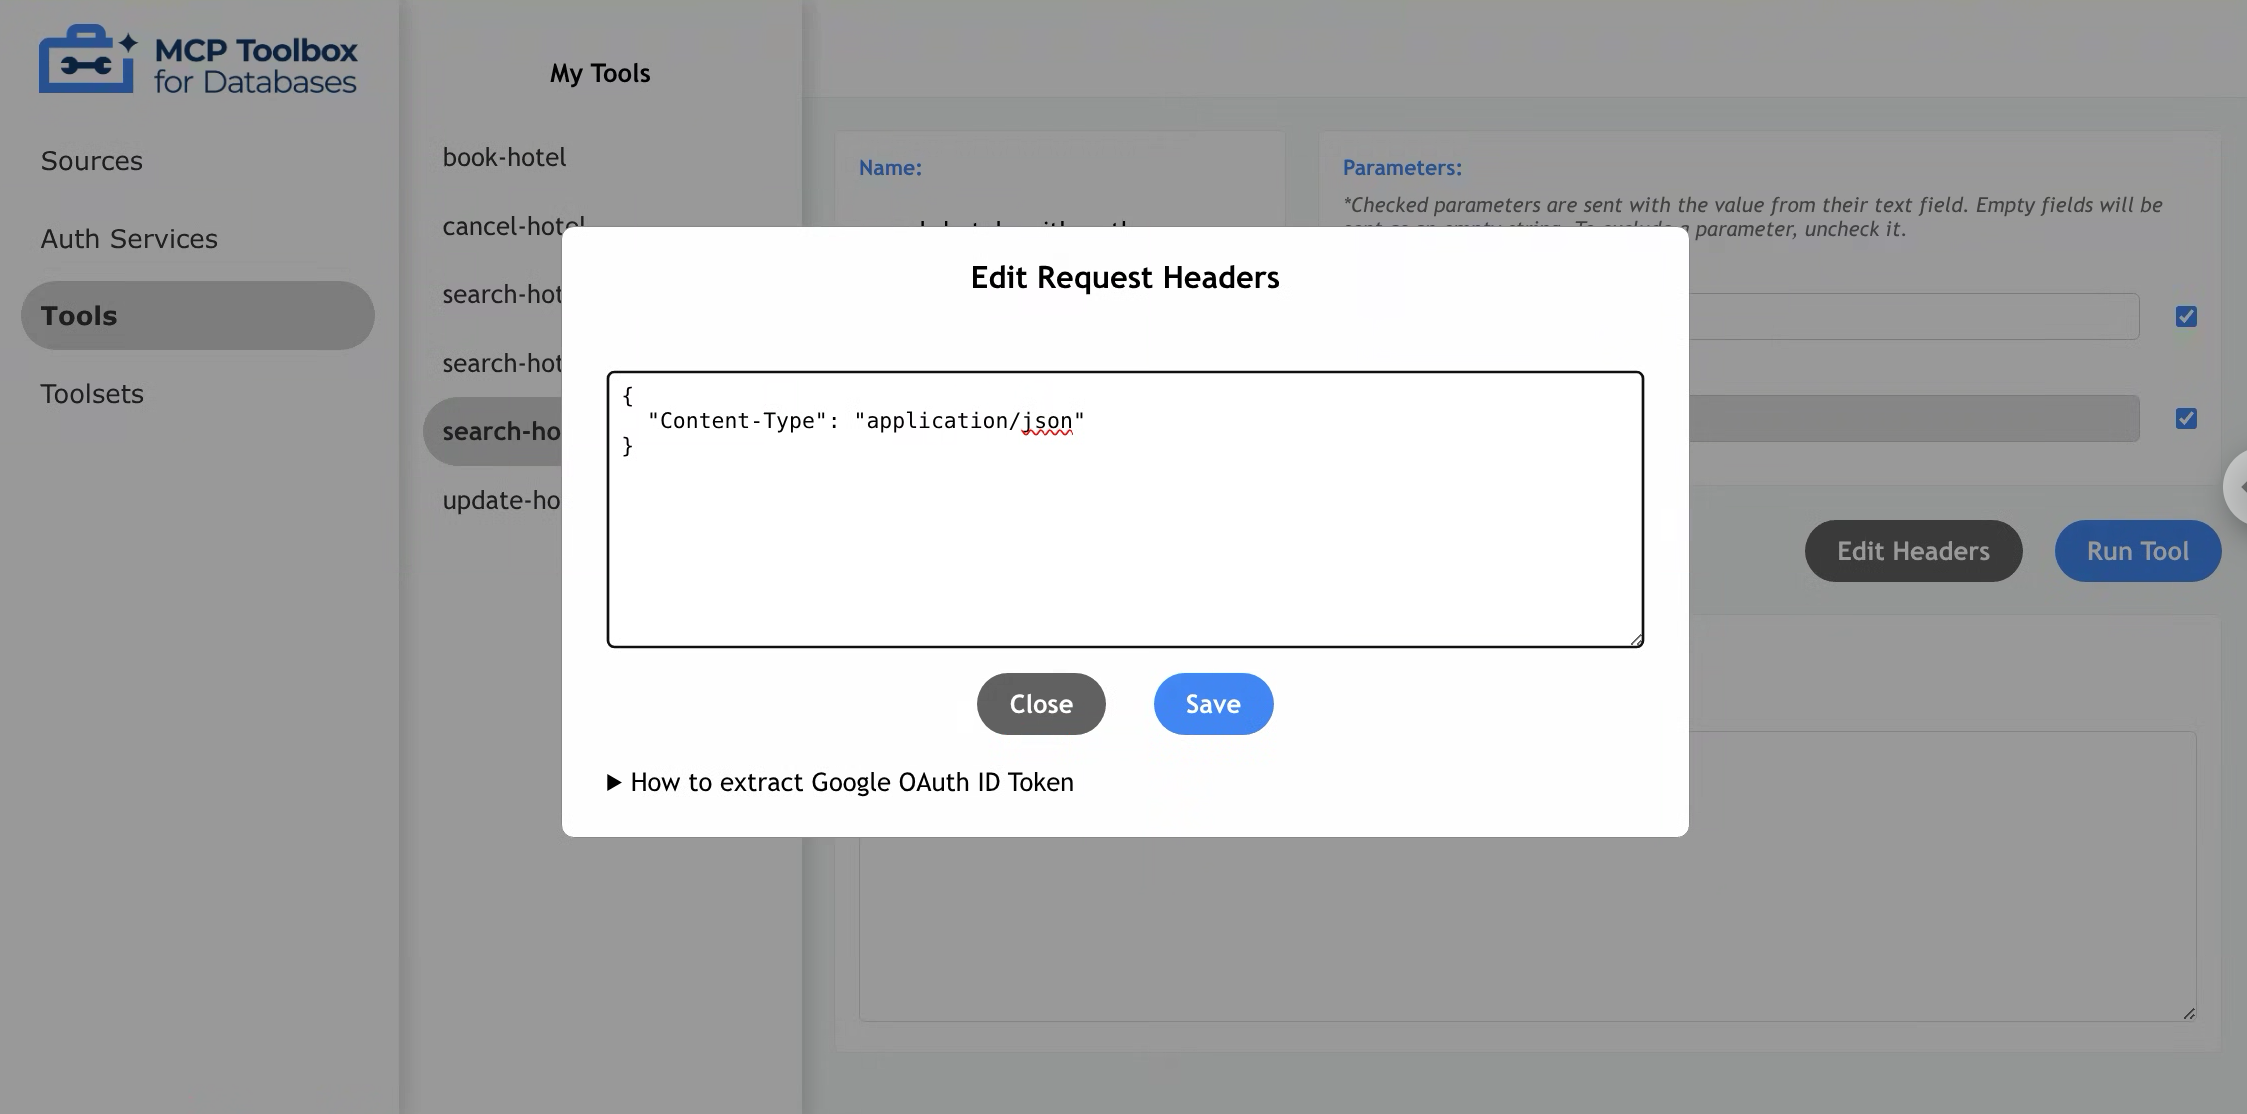
Editing Headers
To edit headers, press the “Edit Headers” button to display the header modal. Within this modal, users can make direct edits by typing into the header’s text area.
Toolbox UI validates that the headers are in correct JSON format. Other header-related errors (e.g., incorrect header names or values required by the tool) will be reported in the Response section after running the tool.
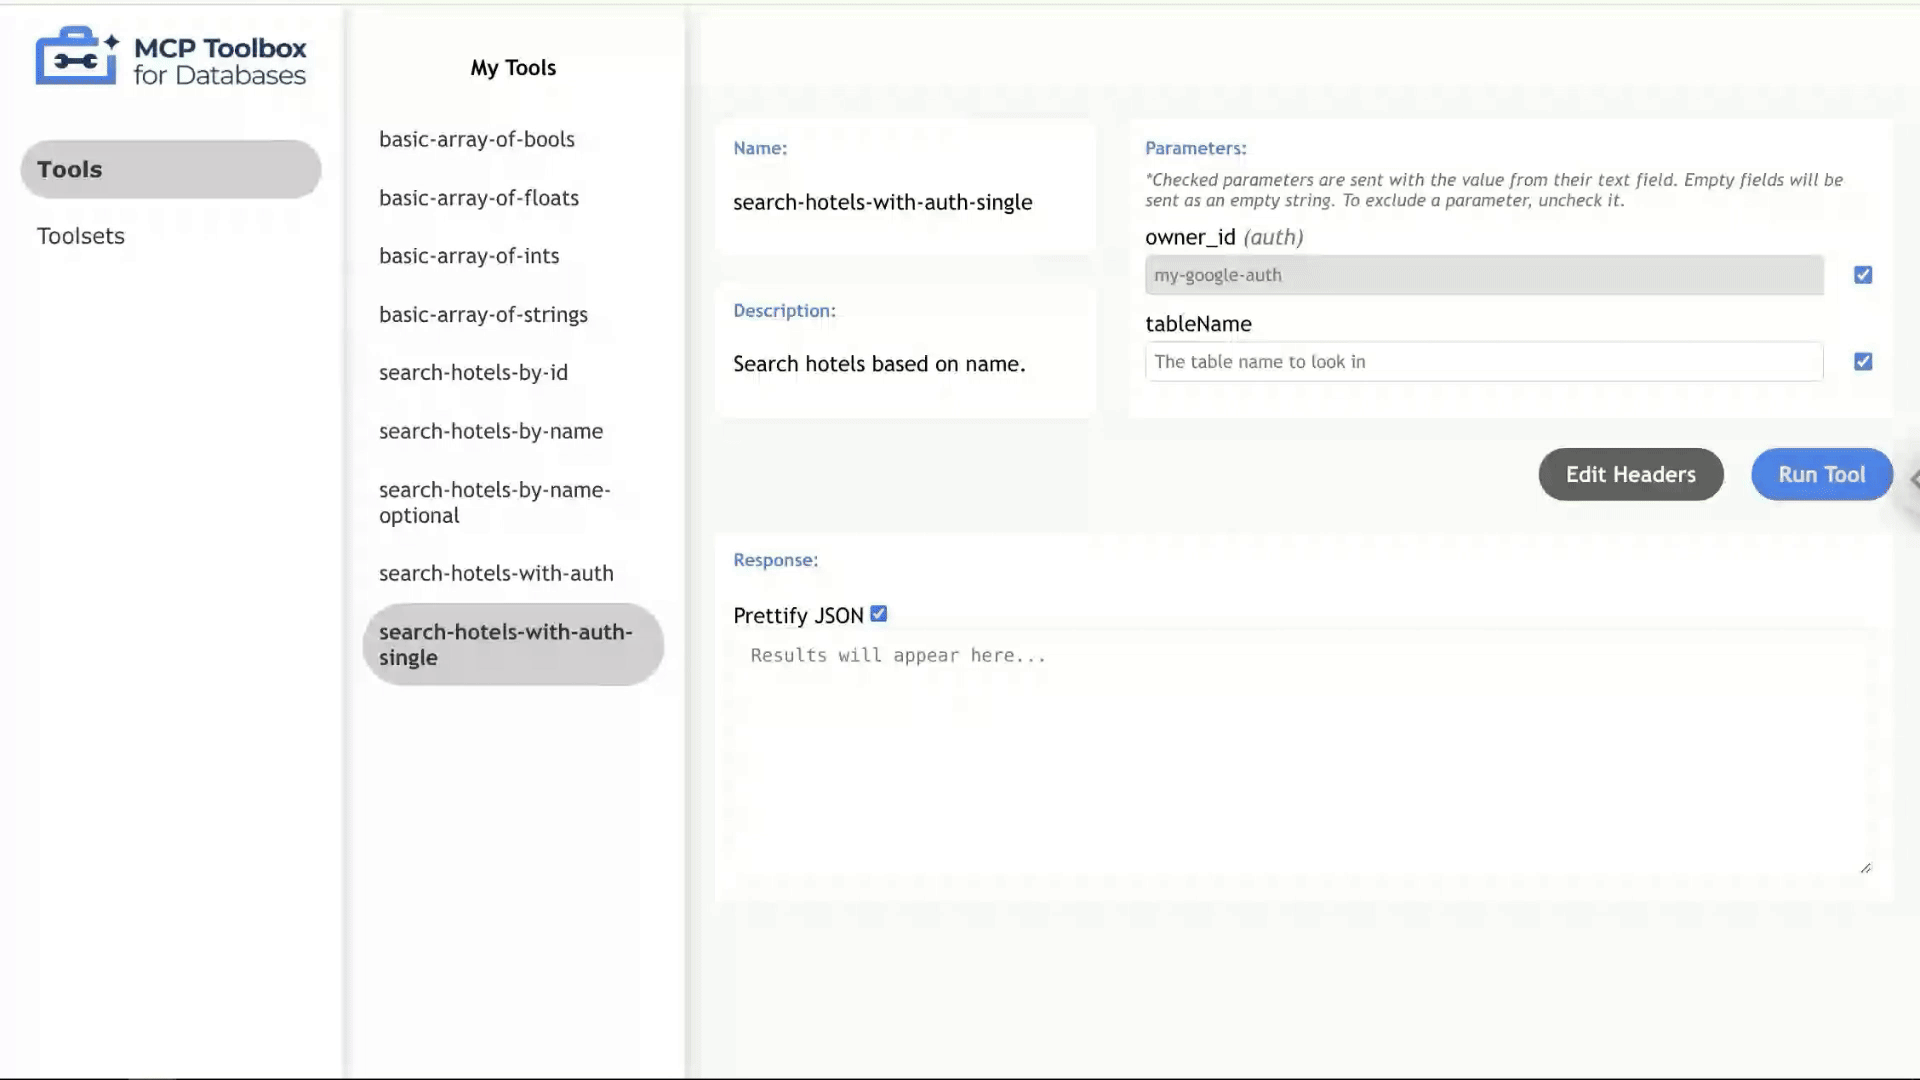
Google OAuth
Currently, Toolbox supports Google OAuth 2.0 as an AuthService, which allows tools to utilize authorized parameters. When a tool uses an authorized parameter, the parameter will be displayed but not editable, as it will be populated from the authentication token.
To provide the token, add your Google OAuth ID Token to the request header using the “Edit Headers”
button and modal described above. The key should be the name of your AuthService as defined in
your tool configuration file, suffixed with _token. The value should be your ID token as a string.
- Select a tool that requires authenticated parameters
- The auth parameter’s text field is greyed out. This is because it cannot be entered manually and will be parsed from the resolved auth token
- To update request headers with the token, select “Edit Headers”
- Checkout the dropdown “How to extract Google OAuth ID Token manually” for guidance on retrieving ID token
- Paste the request header
- Click “Save”
- Click “Run Tool”
{
  "Content-Type": "application/json",
  "my-google-auth_token": "YOUR_ID_TOKEN_HERE"
}
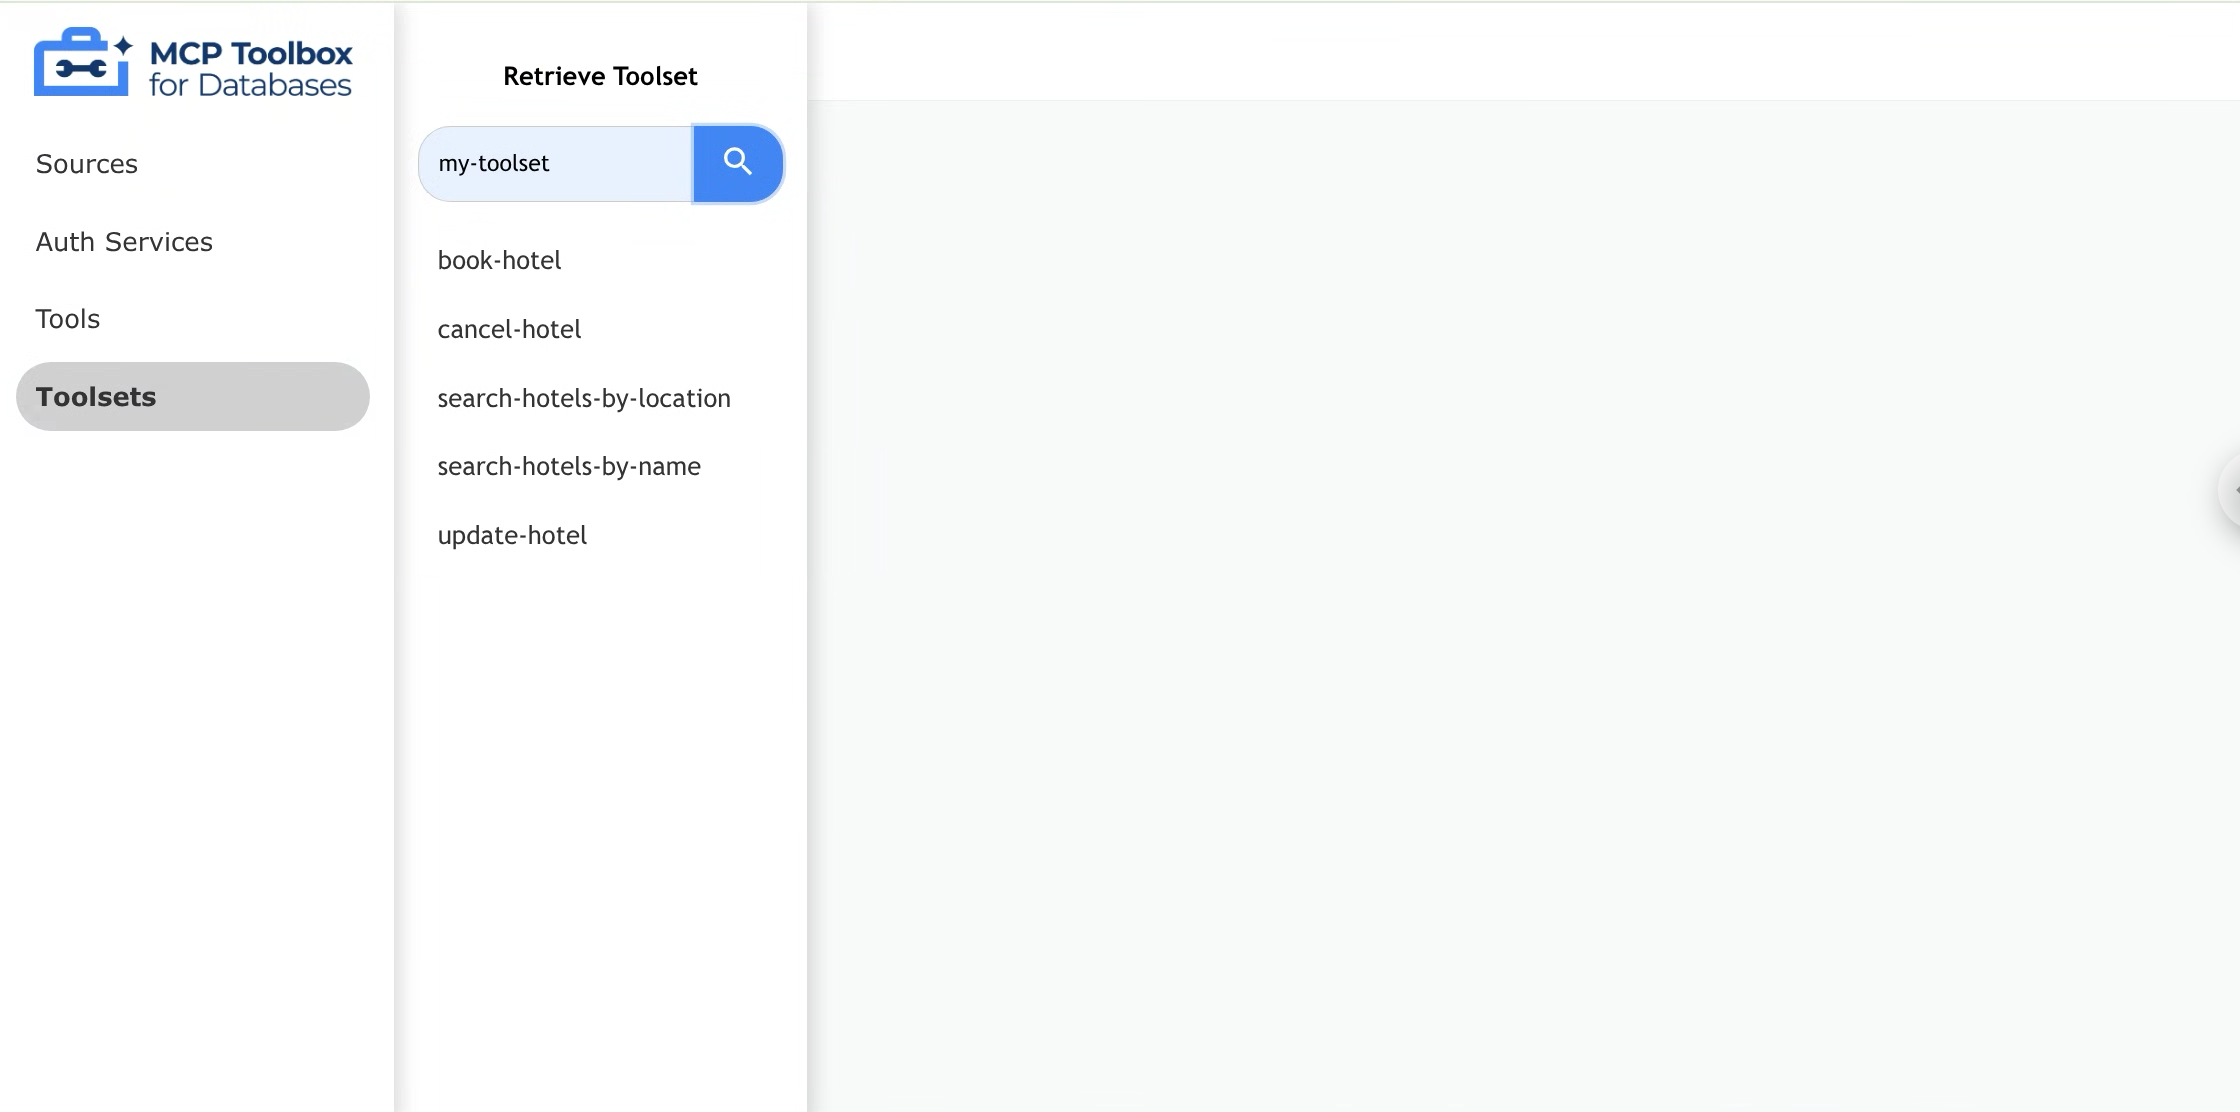
Navigating the Toolsets Page
Through the toolsets page, users can search for a specific toolset to retrieve tools from. Simply enter the toolset name in the search bar, and press “Enter” to retrieve the associated tools.
If the toolset name is not defined within the tools configuration file, an error message will be displayed.