Gemini-CLI and OAuth
Overview
Gemini-CLI can be configured to get an OAuth token from Looker, then send this token to MCP Toolbox as part of the request. MCP Toolbox can then use this token to authentincate with Looker. This means that there is no need to get a Looker Client ID and Client Secret. This also means that MCP Toolbox can be set up as a shared resource.
This configuration requires Toolbox v0.14.0 or later.
Step 1: Register the OAuth App in Looker
You first need to register the OAuth application. Refer to the documentation here. You may need to ask an administrator to do this for you.
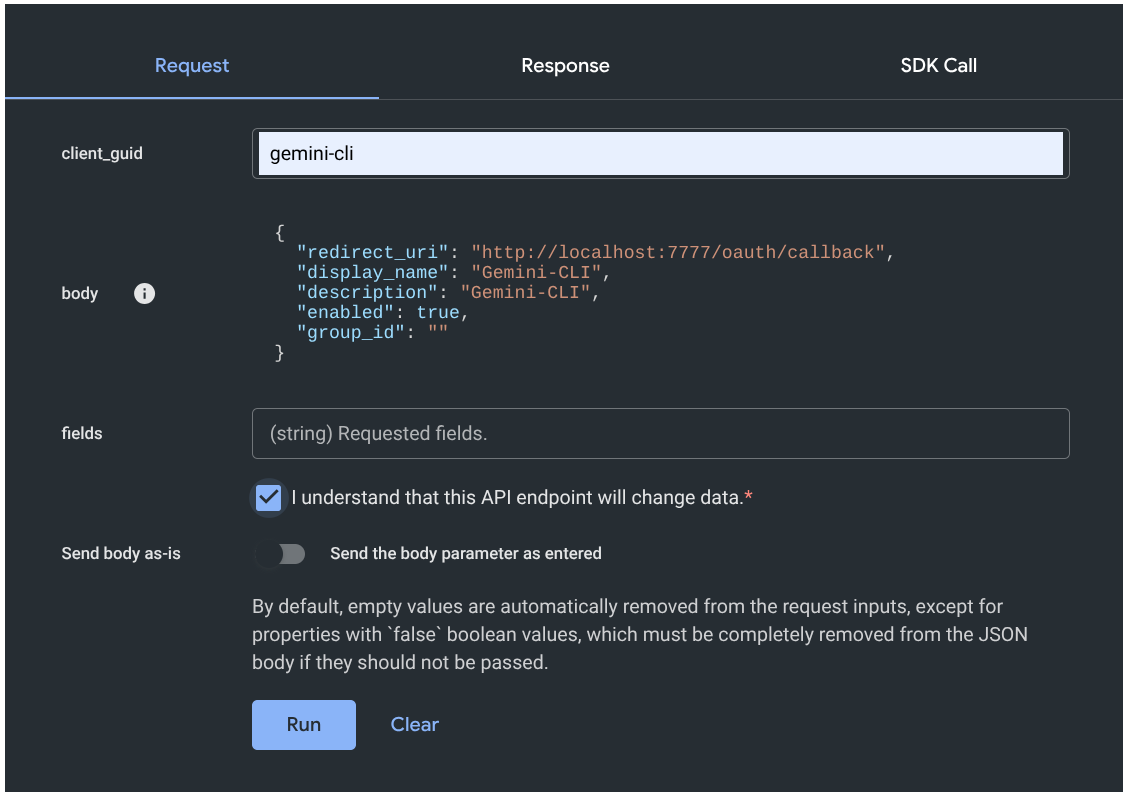
Go to the API Explorer application, locate “Register OAuth App”, and press the “Run It” button.
Set the
client_guidto “gemini-cli”.Set the
redirect_urito “http://localhost:7777/oauth/callback”.The
display_nameanddescriptioncan be “Gemini-CLI” or anything meaningful.Set
enabledto “true”.Check the box confirming that you understand this API will change data.
Click the “Run” button.
Step 2: Install and configure Toolbox
In this section, we will download Toolbox and run the Toolbox server.
Download the latest version of Toolbox as a binary:
Tip
Select the correct binary corresponding to your OS and CPU architecture.
export OS="linux/amd64" # one of linux/amd64, darwin/arm64, darwin/amd64, or windows/amd64
curl -O https://storage.googleapis.com/genai-toolbox/v0.30.0/$OS/toolbox
Make the binary executable:
chmod +x toolboxCreate a file
looker_envwith the settings for your Looker instance.export LOOKER_BASE_URL=https://looker.example.com export LOOKER_VERIFY_SSL=true export LOOKER_USE_CLIENT_OAUTH=trueIn some instances you may need to append
:19999to the LOOKER_BASE_URL.Load the looker_env file into your environment.
source looker_envRun the Toolbox server using the prebuilt Looker tools.
./toolbox --prebuilt lookerThe toolbox server will begin listening on localhost port 5000. Leave it running and continue in another terminal.
Later, when it is time to shut everything down, you can quit the toolbox server with Ctrl-C in this terminal window.
Step 3: Configure Gemini-CLI
Edit the file
~/.gemini/settings.json. Add the following, substituting your Looker server host name forlooker.example.com."mcpServers": { "looker": { "httpUrl": "http://localhost:5000/mcp", "oauth": { "enabled": true, "clientId": "gemini-cli", "authorizationUrl": "https://looker.example.com/auth", "tokenUrl": "https://looker.example.com/api/token", "scopes": ["cors_api"] } } }The
authorizationUrlshould point to the URL you use to access Looker via the web UI. ThetokenUrlshould point to the URL you use to access Looker via the API. In some cases you will need to use the port number:19999after the host name but before the/api/tokenpart.Start Gemini-CLI.
Authenticate with the command
/mcp auth looker. Gemini-CLI will open up a browser where you will confirm that you want to access Looker with your account.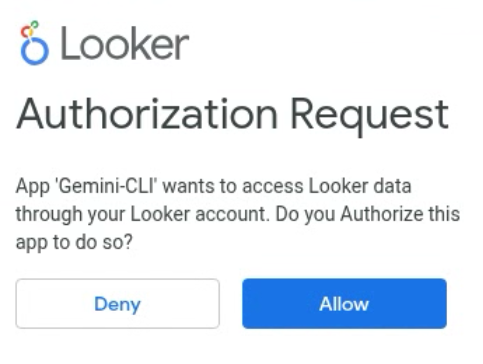
Use Gemini-CLI with your tools.
Using Toolbox as a Shared Service
Toolbox can be run on another server as a shared service accessed by multiple
users. We strongly recommend running toolbox behind a web proxy such as nginx
which will provide SSL encryption. Google Cloud Run is another good way to run
toolbox. You will connect to a service like https://toolbox.example.com/mcp.
The proxy server will handle the SSL encryption and certificates. Then it will
foward the requests to http://localhost:5000/mcp running in that environment.
The details of the config are beyond the scope of this document, but will be
familiar to your system administrators.
To use the shared service, just change the localhost:5000 in the httpUrl in
~/.gemini/settings.json to the host name and possibly the port of the shared
service.